Pages

.

Showing posts with label Pork. Show all posts

Slow-Cooker BBQ Ribs (Fall off the bone tender)

My Father-In-Law makes the best ribs.  He spends all day smoking them and then grilling them to perfection.  They taste absolutely amazing and can't be beat.  

This recipe is for all of us rib lovers that need a super easy recipe that has great results with very little hands-on time.

These ribs start out with a dry rub and are cooked in the slow-cooker without adding any additional liquid.  The ribs will release their own liquid as they cook and there is no need to add any extra.  Then, once they are tender, you brush them will barbecue sauce and broil until they are charred and absolutely perfect.

These ribs are so so so tender.  You can pull the bone out without any effort.  These will definitely satisfy that rib craving.  I served mine with My Favorite Twice Baked Potatoes and it was an incredible Sunday dinner.  


Slow-Cooker BBQ Ribs
(Printable Recipe)

1 1/2 Tbl. smoked paprika
1 Tbl. packed light brown sugar
1 Tbl. kosher salt
2 tsp. pepper
2 tsp. onion powder
2 tsp. garlic powder
2 (2 1/2 - 3 Lb.) racks St. Louis-style spareribs, cut each rack in half
1/2 c. favorite barbecue sauce, or more, if desired

In a small bowl, combine paprika, brown sugar, salt, pepper, onion powder and garlic powder; set aside.  Pat ribs dry with paper towels and coat all over with rub.  Arrange ribs vertically with thick ends pointing down and meaty side against interior wall of slow-cooker (ribs will overlap).  Cover and cook until ribs are just tender, around 6 to 7 hours on low.  

Line rimmed baking sheet with aluminum foil and set a wire rack in pan.  Using tongs, carefully transfer ribs, meaty side up, to prepared rack.  Let ribs sit for 10 minutes to allow surface to dry out.  Adjust oven rack 3 inches from broiler element and heat broiler.  Liberally brush ribs with 1/2 cup of barbecue sauce and broil until sauce begins to char, about 4 minutes.  Remove ribs from oven, brush with additional sauce, if desired.  Tent with foil and allow to rest for 20 minutes.  Cut ribs in between bones to separate and serve.  

Jenn's Notes:  This also works if you want to cover the ribs with the rub the night before, wrap in plastic wrap and refrigerate overnight.  Then, add to the slow-cooker in the morning.  

Cooking method and rub adapted from: Cook's Country 


reade more... Résuméabuiyad

Fresh Garden Tomato Chili


I originally posted this recipe back in 2013.  I have been making it every year since.  I have simplified the recipe a little since then.  I originally would peel my tomatoes, but then I discovered the peel really doesn't stand out to me, so I don't do that anymore, which saves a ton of time.  I also have been throwing the tomatoes in my food processor instead of dicing them.  You can do whichever you prefer.

Here is my original post from 10/07/2013:
My mom brought me a big bag of fresh garden tomatoes the other day.  Garden tomatoes have such an amazing flavor.  A flavor unlike any store-bought tomato.

Rather than eating the usual BLT or making salsa with the tomatoes, I wanted to try something different.  I had seen a recipe for Fresh Tomato Chili awhile back and I wanted to create my own version.

I am super happy with how it turned out and the flavor is incredible.  I prefer a thick and chunky chili and so I simmered mine with the lid off and that way the liquid evaporated.  To top it all off, I added a healthy amount of shredded Cheddar, a dollop of sour cream and some chopped green onions . . .  mmm.

I will make this recipe over and over again.  If you can't get any garden tomatoes, you can always use regular store-bought tomatoes.  The flavor will be a little different, but it will still be good.  If you like a little kick to your chili, you can add some chipotle chili powder or a diced canned chipotle chili in adobo.

Serve alongside:
French Bread Rolls
Soft and Chewy French Bread
Cornmeal Buttermilk Biscuits
Chili Cheese Bake Potatoes (use leftovers)

Fresh Garden Tomato Chili
From: Jenn@eatcakefordinner
(Printable Recipe) 

1/2 Lb. lean ground beef
1/2 Lb. ground pork or ground turkey
1 green bell pepper, chopped
1/2 c. finely chopped onion
1 garlic clove, minced
*12 large ripe garden tomatoes (see notes down below)
1 Tbl. chili powder, or to taste
2 tsp. ground cumin, or to taste
2 tsp. garlic powder, or to taste
1 tsp. oregano, or to taste
2 bay leaves, opt.
1 Tbl. brown sugar
salt and pepper
1 can black beans, drained and rinsed
1 can chili beans, undrained

For serving:

sour cream
shredded Cheddar cheese
chopped green onions
Fritos or tortilla chips

Brown ground beef and ground pork or turkey in a large pot over medium heat.  A few minutes before it is completely cooked through, add the chopped bell pepper and onion and saute for 3-4 minutes.  Add the garlic and saute 30 more seconds.  Add remaining ingredients and stir until combined.  Bring to a boil, then reduce heat and simmer, uncovered, for at least 30 minutes.  I like to simmer mine for at least 2 hours for better flavor.  The longer it simmers the more the liquid will evaporate.  If you like more liquid, then simmer with the lid on.  Taste and adjust seasonings, if needed.  Remove bay leaves before serving. 


Garnish with sour cream, grated Cheddar cheese, chopped green onions and serve with Fritos or crushed tortilla chips.  Serves: 4-6.    


*For the tomatoes:  I like to remove the stem, cut the tomatoes in half and remove half of the seeds.  Then, I throw all of the tomatoes into my food processor and process until there are only a few chunks.  I pour the tomato puree into my chili.  The tomatoes break down when you cook them anyway, so I don't spend the extra time peeling or dicing them.

Or, if you prefer skinned and diced tomatoes, you can remove the peel, stem and seeds and dice, but this will take a lot longer. 


reade more... Résuméabuiyad

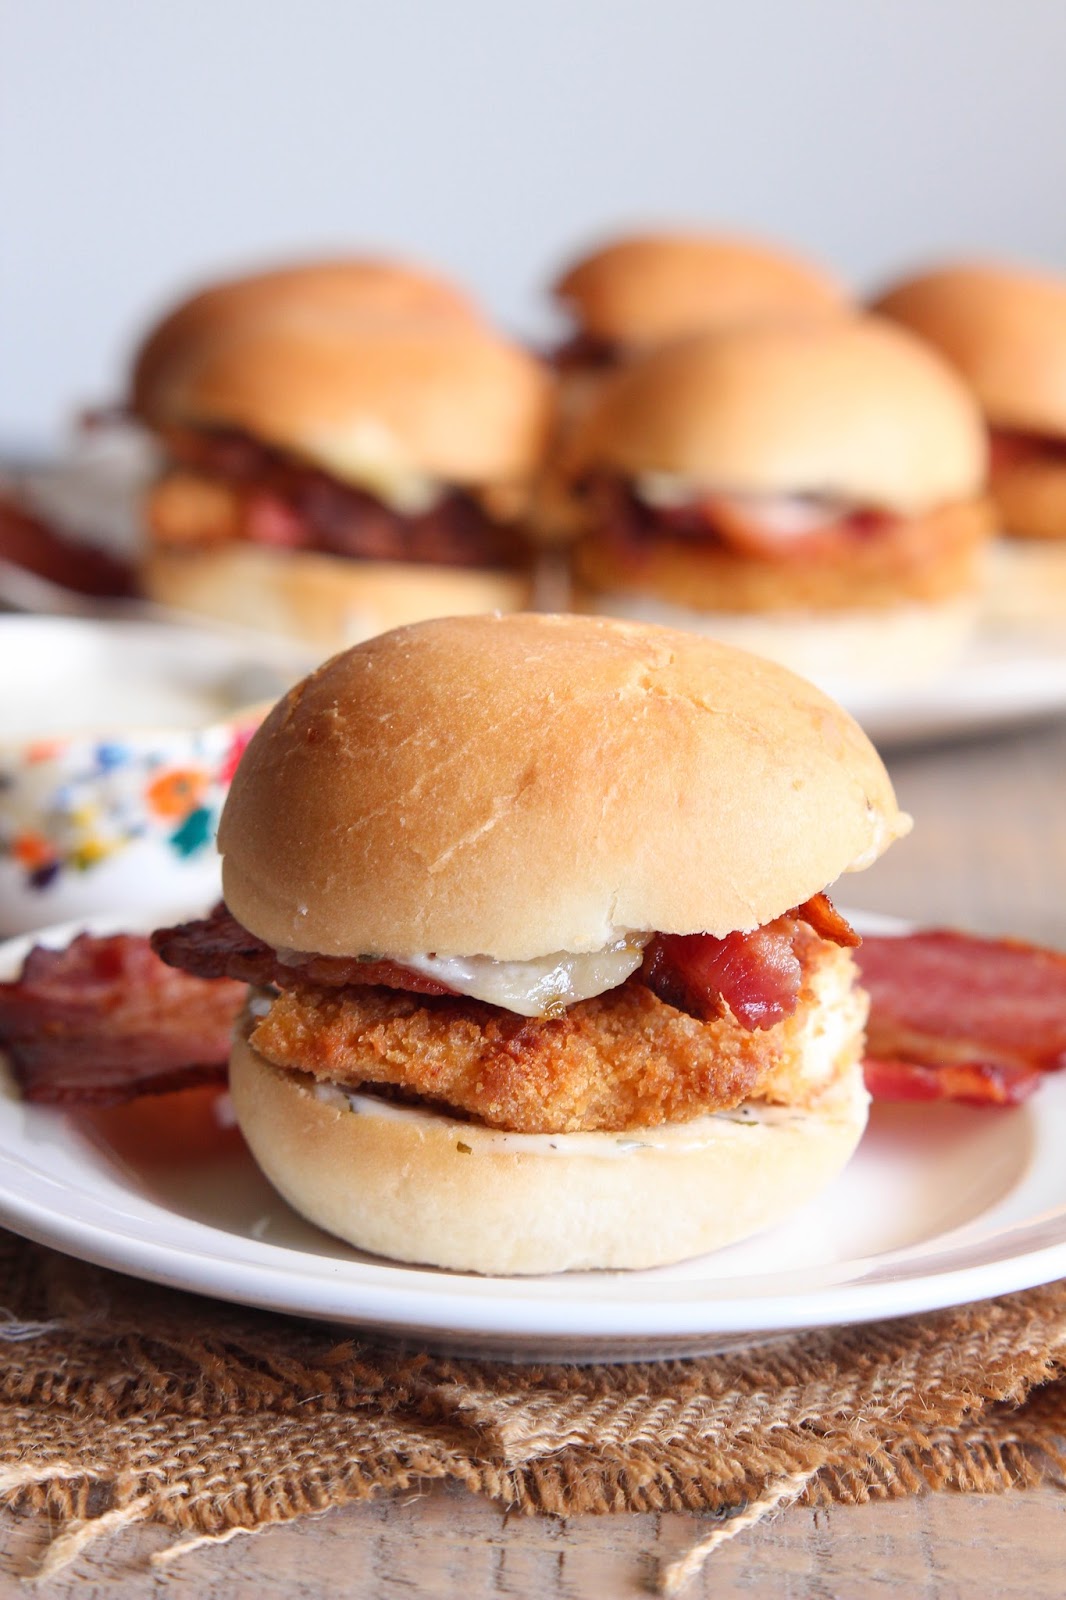
Easy Chicken, Bacon and Ranch Sliders

I recently told one of my friends about the amazing Rhodes Warm-N-Serv Rolls and her family has been enjoying them ever since.  The other night she said they made hamburgers for dinner, but didn't have any buns, so they pulled these rolls out of the freezer, baked them and then had hamburger sliders for dinner within 15 minutes.  That got me to thinking of all the yummy sandwiches that could be made using these delicious Warm-N-Serv Rolls.

One of my favorite combos is bacon, ranch, chicken and cheese.  You can't go wrong with that, right! So, I threw all of the ingredients together and made Chicken, Bacon, Ranch Sliders and let me just tell you that these 5-Ingredient sliders are so dang good.  The soft buttery roll paired with the creamy ranch, crisp bacon, melty cheese and tender chicken is guaranteed to be a huge hit.   

Let me show you how easy these are to make . . . 
First, get all of your ingredients ready.  You will need baked Rhodes Warm-N-Serv Rolls, cooked bacon, cooked breaded chicken tenders, sliced cheese and ranch dressing.  
Slice the baked rolls in half, spread ranch over each half of each roll.  Then, top one half of each roll with sliced cheese.  
Top one half of each roll with sliced bacon.  
Cut the breaded chicken tenders in half.  Top one half of each roll with half of a chicken tender.  Place the tops onto each roll.  Place in a warm oven for a few minutes until the cheese is melted.  Serve.  

#RhodesBread #RhodesRolls #completethemeal

Easy Chicken, Bacon and Ranch Sliders
From: Jenn@eatcakefordinner

6 Rhodes Warm-N-Serv Dinner Rolls
1/4 c. ranch dressing, plus more for serving
3 large slices Pepper Jack cheese (or your favorite cheese)
3-4 slices bacon, cooked
3 frozen breaded chicken tenders, baked

Bake Rhodes Warm-N-Serv Rolls according to package directions.  When finished baking, slice rolls in half and spread ranch dressing over each half.  Cut or tear the slices of cheese into fourths.  Place two pieces of cheese onto one half of each roll.  Tear the bacon into smaller pieces and divide between one half of each roll.  

Cut the cooked chicken tenders in half and place one half onto each half of each roll.  Place tops onto each roll and place in a warm oven until the cheese is melted, about 2-3 minutes.  Serve with additional ranch dressing, if desired.    


This post is sponsored by Rhodes Bread.  I have always been a fan of Rhodes Rolls and all opinions are my own.  Thanks for allowing me to work with the brands that I love. 


reade more... Résuméabuiyad

Breakfast Kolaches

I am a HUGE breakfast person.  I cannot start my day unless I have had something to eat for breakfast.  Sometimes it might just be a piece of wheat toast or a bowl of oatmeal, but my ultimate breakfast is something with eggs and meat.  So, I guess you could say these Breakfast Kolaches are one of my ultimate breakfast dishes, because they are stuffed with eggs, cheese and THREE different kinds of meat.

Imagine a soft and buttery roll stuffed with eggs, sausage, bacon, ham, cheese and a little green onion.  These pillowy puffs of yumminess will satisfy your hunger and will help you start your day energized and ready to go.

You can always cook the sausage and bacon the night before and then in the morning all you have to do is cook the eggs, stuff the rolls and bake.  Super easy.  They are perfect to grab and go.  No plate or utensils are needed.

Let me show you how easy these are to make . . .
First, get your ingredients ready.  You will need 6 thawed Rhodes Dinner Rolls, eggs, cooked sausage, bacon and ham, salt, pepper, grated Cheddar cheese, a little chopped green onion and some butter.
Spray your counter lightly with cooking spray and press each thawed roll into a 5-6 inch circle.  Cover with plastic wrap while you prepare the filling.
Scramble together the eggs, meats, onion and cheese until moist, but not runny.  Season with salt and pepper, to taste.  Cool slightly.  You don't want to add hot filling to your roll dough.  
After filling has cooled slightly, remove plastic wrap from dough circles and place about 1/3 cup of filling on top of each one.  
Brush edge of circles with a little water to help seal.  Then, pull one side of dough over filling and then the opposite side over and press to seal.  
Then, fold one end over and then the last one.  Pinch together to help seal.  Place seam-side down on greased baking sheet.  Bake in preheated oven until golden brown.  Remove from oven and brush with melted butter.  Serve.  

I am sharing this delicious breakfast recipe over at the Rhodes Blog today.  

Breakfast Kolaches

6 Rhodes Yeast Dinner Rolls, thawed but still cold
4 eggs
1/3 cup cooked, chopped ham
1/3 cup cooked bacon pieces
1/3 cup browned ground sausage
1 teaspoon chopped green onion
1/3 cup grated cheddar cheese
salt and pepper to taste
1/2 tablespoon butter, melted

Spray counter lightly with cooking spray. Press each roll into a 5-6 inch circle. Cover circles with plastic wrap while you prepare filling. 

Scramble together eggs, meats, onion and cheese until moist but not runny. Salt and pepper to taste. Cool slightly. Remove wrap from dough circles and place about 1/3 cup filling on each one. 

Wipe edge of circles with water to help seal. Pull one side of dough over filling and then the opposite side over. Press ends flat to seal then fold one end over and then the last one over. Pinch to help seal. Place sealed side down on sprayed baking sheet. Bake at 375°F 12-15 minutes until golden brown. Remove from oven and brush with melted butter.

This post was sponsored by Rhodes Bread and the recipe was provided to me by Rhodes Bread.  All opinions are my own and I have always been a fan of Rhodes Rolls.  Thanks for allowing me to work with the brands that I love. 


SaveSave
reade more... Résuméabuiyad

Shredded Pork Chimichangas

This very well might have been the first time I have eaten a chimichanga.  I remember my Mom making them when I was younger, but I don't remember ever eating them?  I was kinda picky :(

These were surprisingly really easy to make.  I used the same shredded pork recipe I use in my favorite Shredded Pork Tacos.  It marinates overnight and it's tender, juicy and full of flavor.  Then, I loaded them with beans and cheese, rolled them up and pan-fried them until browned and crisp.  The frying part is super fast.  Make sure you don't walk away from the stove or they will burn.

Top them with your favorite toppings and dig in.        

You might also like: 

Shredded Pork Chimichangas
From: Jenn@eatcakefordinner
(Printable Recipe)

For the Shredded Pork
3 Lbs. boneless pork country style ribs (or pork shoulder or loin)
1 Tbl. chili powder
1 tsp. dried oregano
2 tsp. ground cumin
2 1/2 tsp. salt
1/4 tsp. freshly ground black pepper
1/2 c. light brown sugar
2 garlic cloves, minced
1/3 c. finely chopped onion, plus a few
   big onion chunks for cooking
2 - 3 Tbl. olive oil or avocado oil
2 Tbl. cider vinegar

For the Chimichangas
5-6 large burrito-size tortillas
1 (15 oz.) can black beans, rinsed and drained
1 1/2 c. shredded Cheddar cheese
chopped cilantro
vegetable or canola oil, for frying

For Serving (all optional)
shredded lettuce
sour cream
salsa
jarred jalapeños, chopped
chopped cilantro
shredded Cheddar cheese

For the Shredded Pork: Trim any large pockets of fat from the pork and cut pork into 2-3-inch chunks; set aside.  Combine chili powder, oregano, cumin, salt, pepper, brown sugar, minced garlic and the finely chopped onion.  Add two Tablespoons of oil and the cider vinegar and stir together to form a paste.  If it's too thick, add another Tablespoon of oil.  Rub the paste all over the pork, covering ever last bit.  Wrap tightly in plastic wrap and refrigerate overnight.  When ready to cook, place pork in a large, oven-safe, pot and add enough water or chicken broth to cover the pork not quite halfway. Place some onion chunks right on top of the pork.

Cover with a lid and cook in a 300 degree oven until the pork is falling apart, about 3 - 3 1/2 hours, stirring once ever hour.  Remove from oven and allow to rest for about 15 minutes.  Remove the pork chunks and shred, adding some of the cooking liquid, so the pork is nice and juicy. 

To prepare the Chimichangas:  Heat vegetable or canola oil in a large skillet, over medium-high heat.  You will want to add enough oil to cover the entire bottom of the pan.  Meanwhile, lay tortillas out on the counter.  Divide shredded pork between tortillas.  Then, top each one with black beans, shredded cheese and some chopped cilantro.  Roll up each tortilla, folding in the sides as you roll, to form a burrito.  Place, seam-side down, in the hot skillet.  It's easiest for me to cook one at a time.    

This cooking process will go extremely fast, so don't walk away.  Once first side is browned, use tongs and flip over to brown the other side.  Then, use the tongs to hold and brown both edges, so all four sides are crispy.  Remove  chimichanga and place on a paper towel lined plate.  Repeat. 

For Serving:  Top chimichangas with desired toppings and serve.  Serves: 5-6.   


SaveSaveSaveSave
reade more... Résuméabuiyad